Hello, this video will go through the process of deploying one identity's active roles from the AWS marketplace. Prior to stepping through this video, we'll review a few of the prerequisites that were already preconfigured prior to this process. EC2 platform is in place along with an AWS-managed Microsoft AD domain. An on-prem domain was already accessible to the VMs running in EC2, and DNS conditional forwarders were already configured for the necessary domain name resolution.
Within the AWS-managed Microsoft AD domain, a service account was precreated for active roles, along with a security group that will contain the active roles' admins. For the database backend, an RDS Microsoft SQL server was deployed along with two blank databases. One database will be for the configuration database for active roles, and the other one will be for the management history. The connections to this RDS Microsoft SQL server can be made using windows authentication or SQL authentication. This video will review the process of using a SQL account to make the database connections.
From the active roles AWS marketplace page, to begin the process, click the View Purchase Options button in the upper right corner. From here you can review the terms and conditions. And when ready, they can be accepted by clicking the Accept Terms button. This will take a few minutes to provision. When it's available, the Continue to Configuration button in the upper right corner will become available.
Now we can see the fulfillment options, the active roles version to install, and which region to deploy this in. When ready, click the Continue to Launch button. This brings up additional VM settings. You can launch from website, which is this website here. Or you can launch the VM settings from the EC2 console. We will leave the launch from website selected. The EC2 instance type determines the number of processors and the amount of RAM. Select the appropriate option for the active roles deployment in your environment. Select the VPC. In this environment, there's only one. Then you can select the subnet to add the VM to.
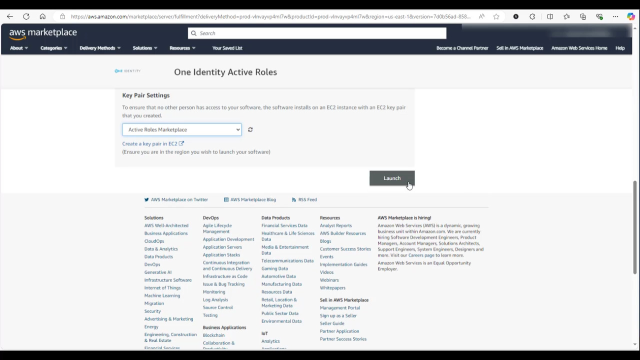
Security groups are really firewall settings. You can select an initial group to add the VM to once it's created. And go ahead and create a new key pair for this VM. This will be required later to decrypt the default administrator password that's going to get assigned to the server once the VM is up and running.
Select PEM. This will automatically download a file, which we're going to reference later to get the administrator password. Once the key pair is created, select that key pair. You may need to click the Refresh button to get that key pair to show up. Then click Launch. This will take a few minutes for the VM to initialize, but once it's up and running, change the name column field to the name the server is going to have at the operating system level. We can click Actions, Security, Change Security Groups. This might be necessary to add the VM to any additional security groups to allow it to access additional resources within the EC2 environment. The security group that's being added here will allow it to access the RDS database.
Once that's completed, click the Connect button at the top. This will be where we can download the RDP file and also decrypt the default administrator password. Reference that PEM file that was downloaded. Copy and paste the contents of that file into the area here. Decrypt password. It will show the password on the screen. We can copy it and paste it for later use.
And once we have that password we can go back to Connect. And now we can download the RDP file to make our initial connection to the server. It will default to administrator. We can paste in the password. First order of business when connecting to the server for the first time is to rename it. We'll provide the same name that was given to it in the EC2 console. This will require reboot.
Once the server's restarted and backed up, the next thing that will happen here is you'll join it to the AWS-managed Microsoft AD domain. This will require another reboot of the server. There may have been additional IP configuration changes that needed to be made to the server, such as maybe setting up an internal DNS server to get all that name resolution to happen.
Once the server is back up, we'll begin the configuration of active roles by launching the configuration center. The first thing we did was specify a service account. Now we're specifying the security group in AD that contains our active roles administrators. For the configuration database, we will tell it it's a new database, but it's a preexisting blank database. Supply the RDS SQL information, including the precreated database name and the SQL authentication credentials. We will do the same thing here for the management history database.
There are certain things in the active roles database that are encrypted. The export of this encryption key is necessary in the event that active roles might need to be restored on a new server and a new database server. This will tell active roles how to decrypt the encrypted information. You can review the information here. Click Configure. This will begin the configuration of the active roles service, as well as configure it to talk to the two databases.
At this point, the active roles service is starting. We can click the Administration Service tab here in the configuration center and wait for it to go from Getting Ready to Ready For Use. At this point, if you'd like, you can create the three default web interfaces for active roles.
Once the websites are created, we are done with the configuration center for now. We can now launch the active roles main MMC console to begin active roles configuration. When initially launching active roles, there is no service connection point in active directory. So click the Options button and type in localhost to connect to the active roles instance, which is local to this VM.
The first action to do when active roles is configured and up and running is to add a managed domain. We will add two managed domains. The first managed domain will be the AWS-managed Microsoft AD domain that the server has joined to. The service account has already been pre-permissioned so it has all the necessary permissions to talk to this domain.
The next domain that will be added here will be the on-premise AD domain for your environment. This can be handled maybe via VPN connection, or there's a domain controller for your domain inside of your EC2 platform, which is what the case is here. So supply the necessary connection information that domain can be connected to and also added as a managed domain in active roles.
This completes the initial deployment of active roles in AWS. From here we can reconnect to refresh the interface. Now both domains can be browsed to from a single interface. Thank you for watching.
 09:20
09:20